Melting chocolate can transform a simple dessert into a gourmet delight, but it’s often a delicate operation that can quickly turn frustrating. You might be aiming for a silky, smooth drizzle, only to end up with a grainy, seized mess or, worse yet, burnt chocolate. While many factors contribute to successful chocolate melting, one often overlooked culprit is the humble bowl you choose. The right bowl can be your best friend, ensuring even heat distribution and a perfect melt; the wrong one, however, can lead to a cascade of common mistakes that derail your culinary efforts. Understanding the subtle nuances of different bowl materials and their interaction with heat is crucial for achieving that coveted glossy finish every time.
Understanding the Impact of Bowl Material on Melting Chocolate
The material of your melting vessel plays a far more significant role than you might imagine. Different materials conduct and retain heat distinctively, directly influencing how your chocolate melts. Selecting the appropriate bowl for your chosen melting method—whether a double boiler or microwave—is the first step towards a flawless outcome.
The Glass Gamble
Table is empty.Glass bowls, especially those made from borosilicate (like Pyrex), are a common sight in many kitchens. They are generally microwave-safe and allow you to visually monitor the chocolate as it melts. However, glass is an excellent insulator and retains heat exceptionally well. This characteristic, while beneficial for keeping food warm, can be detrimental when melting chocolate. It can cause the chocolate at the edges to overheat and burn, even after being removed from the heat source. The residual heat can continue to cook the chocolate, leading to a grainy texture or scorching. Non-borosilicate glass can also be susceptible to thermal shock, potentially cracking or shattering if exposed to sudden temperature changes, especially during the double boiler method where it might come into contact with boiling water. For microwave melting, using glass requires constant vigilance and frequent stirring in very short intervals to prevent overheating.
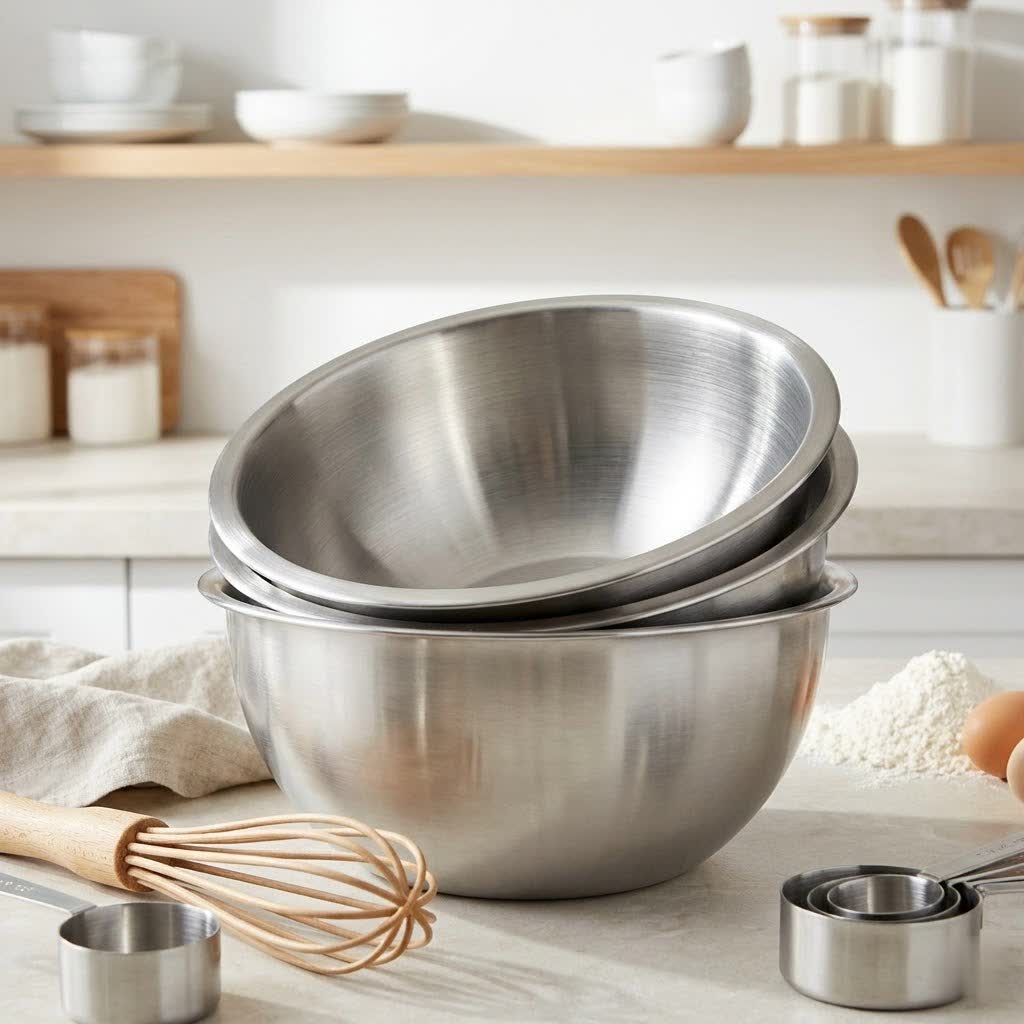
Stainless Steel’s Strength
Stainless steel bowls are a favorite among professional chefs and home bakers alike, particularly for the double boiler method. This material is prized for its excellent heat conductivity and durability. Stainless steel heats up quickly but also cools down relatively fast once removed from the heat source, reducing the risk of residual heat burning the chocolate. Its non-reactive surface ensures that the chocolate’s flavor remains pure, without any metallic aftertaste. Wide, low-profile stainless steel bowls are particularly effective, offering a larger surface area for the chocolate to melt evenly and for easy stirring.
Plastic’s Practicality
When it comes to microwave melting, microwave-safe plastic bowls can be a surprisingly good choice. Unlike glass, plastic does not retain heat as intensely, which can reduce the risk of overheating and burning your chocolate. They are also lightweight and often flexible, making pouring easier. However, it is paramount to ensure the plastic bowl is explicitly labeled “microwave-safe” and, ideally, BPA-free. Using non-microwave-safe plastic can lead to warping, leaching of chemicals into your food, or even melting the bowl itself. Plastic bowls are generally not recommended for the double boiler method, as the direct steam can cause them to warp or degrade.
Silicone’s Smooth Touch
Silicone bowls and melting cups have gained popularity for their non-stick properties and flexibility. Silicone is an excellent heat-resistant material that helps protect chocolate from rapid overheating, providing a gentler melt. Its pliable nature makes it incredibly easy to pour melted chocolate without waste, and cleanup is often a breeze. Silicone bowls are versatile enough for both microwave use and as an insert for a double boiler, though they might feel less stable than stainless steel.
Ceramic’s Charm
Ceramic bowls can be aesthetically pleasing and retain heat effectively, making them a good choice for serving melted chocolate, like in a fondue setup. For melting, especially in the microwave, ceramic works similarly to glass—it heats up and retains that heat, posing a risk of overheating if not carefully monitored. It’s crucial that any ceramic bowl used for melting is explicitly labeled microwave-safe, as some decorative glazes are not suitable for high temperatures and can even contain lead. Ceramic can also be heavy and, like glass, prone to chipping or cracking if mishandled or subjected to sudden temperature changes.
The Critical Role of Bowl Size and Fit
Beyond the material, the size and fit of your bowl are paramount, especially when employing the classic double boiler method. This technique relies on indirect heat from simmering water to gently melt the chocolate, and a poorly chosen bowl can quickly sabotage the process.
For a double boiler, the melting bowl should sit snugly over the saucepan, creating a seal that prevents steam from escaping. Crucially, the bottom of the melting bowl must not touch the simmering water. If the bowl makes direct contact with the water, the chocolate will be exposed to too much direct heat, causing it to overheat and burn. Conversely, if the bowl is too large for the saucepan, it may sit at an awkward angle, leading to uneven melting or allowing steam to escape and potentially condense back into the chocolate. The ideal setup allows the steam to circulate gently around the base and sides of the bowl, providing a consistent, low heat for a smooth melt.
Moisture: The Ultimate Enemy of Melted Chocolate
Even the tiniest drop of water can be catastrophic for melting chocolate, causing it to “seize.” Seizing occurs when water comes into contact with melted chocolate, causing the sugar particles to crystallize and the cocoa solids to clump together, turning your smooth liquid into a grainy, unworkable paste. This is a common mistake that can be directly influenced by your bowl choice and preparation.
To prevent seizing, ensure your melting bowl and any utensils (spatulas, spoons) are absolutely bone dry before they touch the chocolate. When using a double boiler, be mindful of condensation; if steam escapes from under the bowl and condenses on the rim or lid, it can drip back into the chocolate. A snugly fitting bowl helps prevent this, but wiping the underside of the bowl periodically can add an extra layer of protection. Avoid using wooden spoons, as wood can retain moisture even when appearing dry. Silicone or rubber spatulas are generally safer choices.
Overheating: The Silent Chocolate Killer
Overheating is another leading cause of chocolate melting disasters, often resulting in burnt flavor, a dull finish, and a thick, clumpy texture. The wrong bowl can exacerbate this issue. Materials like glass and ceramic, due to their heat retention properties, can continue to heat the chocolate even after being removed from the stove or microwave, making it easy to accidentally scorch your batch.
The key to preventing overheating is to use low, gentle heat and consistent stirring. For microwave melting, this means heating in very short bursts (15-30 seconds), stirring thoroughly after each interval, and stopping when a few small lumps remain, allowing residual heat to complete the melting process. With a double boiler, maintain a gentle simmer, not a rolling boil, and remove the bowl from the heat just before the chocolate is fully melted, continuing to stir until smooth. Being proactive about temperature control, partly through your bowl choice, is essential for a silky, unburnt result.
Table: Choosing the Right Bowl for Your Melting Method
| Feature / Method | Double Boiler | Microwave |
|---|---|---|
| Stainless Steel | ✅ Ideal (wide, low profile) | ❌ Not microwave-safe |
| Glass (Borosilicate) | ✅ Good (doesn’t touch water) | ✅ Good (short bursts, stir) |
| Plastic (Microwave-Safe) | ❌ Not ideal (can warp from steam) | ✅ Ideal (less heat retention) |
| Silicone | ✅ Good | ✅ Good |
| Ceramic (Microwave-Safe) | ✅ Good (doesn’t touch water) | ✅ Good (short bursts, stir) |
Expert Tips for Flawless Chocolate Melting
Beyond selecting the right bowl, a few expert techniques can elevate your chocolate melting game. Firstly, always chop your chocolate into small, uniform pieces. This ensures that all pieces melt at roughly the same rate, preventing some from burning while others remain solid. A rubber or silicone spatula is your best friend for stirring, as it won’t scratch your bowls and is non-reactive. When microwaving, remember the “low and slow” mantra: use short bursts of power and stir frequently, even if the chocolate doesn’t look fully melted.
“Many home bakers rush the melting process, but patience is your secret ingredient. Always remove the chocolate from heat when it’s still slightly lumpy, and let the residual warmth finish the job. This prevents scorching and guarantees that velvety texture.” – Chef Isabella Rossi, Chocolatier and Pastry Instructor
Finally, remember that different types of chocolate (dark, milk, white) have varying melting points. Dark chocolate can withstand slightly higher temperatures, while milk and white chocolate burn more easily due to their lower cocoa solid and higher sugar content. Adjust your heat and stirring frequency accordingly.
Conclusion
Melting chocolate doesn’t have to be a source of stress in the kitchen. By understanding the common mistakes associated with using the wrong bowl, you can significantly improve your chances of achieving perfectly smooth, glossy, and delectable melted chocolate every time. Whether you opt for the even heat distribution of stainless steel in a double boiler, the gentle melting power of microwave-safe plastic, or the versatility of silicone, the key lies in an informed choice, careful preparation, and mindful execution. Armed with the knowledge of how bowl materials and size impact the melting process, you’re now ready to conquer any chocolate-based creation. So, which bowl will become your trusted companion in the pursuit of chocolate perfection?
Frequently Asked Questions
Can I melt chocolate in any plastic bowl?
No, you should only use plastic bowls explicitly labeled “microwave-safe” when melting chocolate in the microwave. Other plastics may warp, melt, or leach chemicals into your food when heated.
Why does my chocolate seize when melting?
Chocolate seizes when it comes into contact with even a tiny amount of moisture, causing the sugar crystals to clump together. Ensure your bowl and all utensils are completely dry, and prevent any steam or condensation from dripping into the chocolate.
What happens if my bowl touches the water in a double boiler?
If your melting bowl touches the simmering water in a double boiler, the chocolate will be exposed to direct, excessive heat, leading to overheating, burning, and a grainy or seized texture. The bowl should fit snugly above the waterline, allowing only steam to heat it.
How do I know if my ceramic bowl is microwave-safe?
Most microwave-safe ceramic bowls will have a specific label or symbol (often waves or a microwave icon) on the bottom. If there’s no label, it’s best to err on the side of caution and use a different bowl to avoid potential cracking or leaching from unsuitable glazes.
Is it better to melt chocolate in glass or stainless steel?
For the double boiler method, stainless steel is generally preferred due to its excellent heat conductivity and ability to cool down quickly. For microwave melting, borosilicate glass can work with careful, short bursts and frequent stirring, but plastic or silicone might be safer choices as they retain less heat.