Stainless steel bowls are a cornerstone in any kitchen, prized for their durability, versatility, and sleek appearance. However, even these robust kitchen workhorses aren’t immune to the occasional scratch. Whether it’s from vigorous whisking, accidental drops, or improper storage, those unsightly marks can diminish the bowl’s shine and, over time, potentially harbor food particles. But don’t fret! Restoring your beloved stainless steel bowls to their former glory is often simpler than you think. With the right techniques and a little patience, you can effectively remove scratches and keep your bowls looking pristine for years to come.
Understanding Stainless Steel and Its Vulnerability to Scratches
Before diving into scratch removal, it’s helpful to understand what makes stainless steel both resilient and susceptible to damage. Stainless steel is an iron alloy with a minimum of 10.5% chromium, which creates a passive layer on its surface, protecting it from corrosion and rust. This passive layer is what gives stainless steel its renowned durability. However, this protective layer can be scratched by abrasive materials or forceful impacts.
Scratches come in various forms: hairline marks, superficial scuffs, and deeper gouges. Hairline scratches are often just surface-level disturbances that affect the aesthetic, while deeper scratches can penetrate the protective layer, potentially making the area more prone to minor staining or corrosion if not properly addressed. The key to successful scratch removal lies in accurately assessing the depth of the damage and selecting the appropriate method.
Effective Methods for Removing Scratches from Stainless Steel Bowls
Addressing scratches on your stainless steel bowls requires a tailored approach based on their severity. For minor imperfections, household remedies can work wonders. For more significant damage, specialized products or professional techniques might be necessary.
1. Mild Abrasives for Minor Scratches
Minor scratches, often appearing as light scuffs or dull marks, can frequently be buffed out using gentle abrasive pastes you likely already have in your pantry. The goal here is to gently abrade the surrounding surface down to the level of the scratch, making it disappear into the finish.
- Toothpaste: Regular, non-gel white toothpaste contains mild abrasives that can smooth out light scratches. Apply a small amount of toothpaste to a clean, soft cloth. Gently rub the scratched area in the direction of the stainless steel’s grain. The grain refers to the subtle lines or brushed pattern on the metal’s surface. After a few minutes of rubbing, rinse the bowl thoroughly with water and dry with a microfiber cloth. Repeat if necessary until the scratch fades.
- Baking Soda Paste: Similar to toothpaste, baking soda is a gentle abrasive. Create a paste by mixing baking soda with a small amount of water (approximately 2 parts baking soda to 1 part water). Apply the paste to the scratch using a soft cloth or sponge, rubbing gently with the grain. Rinse thoroughly and dry. This method is excellent for surface scratches and can also help remove minor discoloration.
- Olive Oil (for very light marks): While not an abrasive, olive oil can sometimes visually diminish very fine, superficial marks by filling them in and enhancing the surrounding luster. Dab a small amount of olive oil onto a clean cloth and gently buff the stainless steel surface in the direction of the grain. Wipe away any excess oil with a clean cloth. This is more of a temporary fix for visual improvement rather than actual scratch removal.
|
Our Picks for the Best Mixing bowl in 2026
As an Amazon Associate I earn from qualifying purchases.
|
||
| Num | Product | Action |
|---|---|---|
| 1 | Priority Chef Premium Mixing Bowls With Lids Set, Airtight Lids, Thicker Stainless Steel, Non-Slip Base, 5 Nesting Steel Bowls for Kitchen, Large Prep Metal Bowl Set 1.5/2/3/4/5 Qt, Black |

|
| 2 | Umite Chef Mixing Bowls with Airtight Lids Set, 8PCS Stainless Steel Khaki Nesting Bowls with Grater Attachments, Kitchen Bowls with Non-Slip Bottoms, Size 5, 4, 3.5, 2, 1.5QT for Mixing & Serving |
|
| 3 | Cuisinart Mixing Bowl Set, Stainless Steel, 3-Piece, CTG-00-SMB |
|
| 4 | Glad Mixing Bowls with Pour Spout, Set of 3 | Nesting Design Saves Space | Non-Slip, BPA Free, Dishwasher Safe Plastic | Kitchen Cooking and Baking Supplies, White |
|
| 5 | Winco , 8-Quart, Stainless Steel (MXB-800Q) |
|
| 6 | OXO Good Grips 5-Quart Mixing Bowl |
|
| 7 | Fox Run Brands 2.75-Quart Stainless Steel Mixing Bowl, 9 x 9 x 4 inches, Metallic |
|
| 8 | Glad Mixing Bowls with Pour Spout, Set of 3 | Nesting Design Saves Space | Non-Slip, BPA Free, Dishwasher Safe Plastic | Kitchen Cooking and Baking Supplies, Sage Green |
|
| 9 | Winco 5 Quart Heavy-Duty Stainless Steel Mixing Bowl, Deep |
|
| 10 | JoyJolt Stainless Steel Mixing Bowl Set - 6 Piece Nesting Bowls, 5qt to 0.5qt, Ideal for Kitchen, Cooking, Baking and Storage |
|
2. Commercial Stainless Steel Scratch Removal Kits
For scratches that are too stubborn for household remedies but not deep enough to warrant professional intervention, commercial scratch removal kits are a highly effective solution. These kits typically include abrasive pads, polishing compounds, and sometimes a lubricant.
Commercial kits work by using progressively finer abrasive pads to carefully sand down the scratched area, followed by a polishing compound to restore the original finish. It’s crucial to follow the manufacturer’s instructions precisely, as incorrect usage can lead to more damage. Always work in the direction of the grain, applying even pressure. Popular kits like Scratch-B-Gone or Siege 63001 offer step-by-step processes to help restore your bowls effectively.
3. Sanding and Polishing for Deeper Scratches
When faced with deeper scratches, a more aggressive approach involving sanding and polishing may be required. This method demands careful attention and is generally recommended for those with some DIY experience or for consultation with a professional. The goal is to carefully abrade the metal surrounding the scratch until the scratch itself is no longer visible, then gradually refine the surface to blend seamlessly with the rest of the bowl.
Start by cleaning the bowl thoroughly. Identify the grain direction. Use wet, fine-grit sandpaper (starting around 400-grit and moving to 600-grit or even finer, such as 1000-grit) soaked in water. Wrap the sandpaper around a sanding block to ensure even pressure. Rub gently in the direction of the grain, focusing only on the scratched area. As the scratch diminishes, switch to finer grits. After sanding, use a stainless steel polishing compound with a soft cloth to restore the shine and blend the repaired area with the surrounding surface. Always finish by cleaning and buffing the entire bowl to ensure a uniform appearance.
Step-by-Step Guide to Scratch Removal (General Approach)
Regardless of the method you choose, a consistent approach will yield the best results.
- Clean the Bowl Thoroughly: Wash the stainless steel bowl with mild dish soap and warm water to remove any food residue, grease, or dirt. Dry it completely with a clean, lint-free cloth. A clean surface is crucial for identifying scratches accurately and preventing further damage from trapped debris.
- Identify the Grain Direction: Stainless steel often has a subtle brushed finish with a visible grain. Before applying any abrasive, observe the direction of these fine lines. You must always work with the grain, never against it, to avoid creating new scratches or exacerbating existing ones.
- Test on an Inconspicuous Area: If you’re using a new product or method, always test it on a small, hidden section of the bowl first. This allows you to assess its effect on the finish before treating a more visible area.
- Apply Your Chosen Method: Follow the specific instructions for toothpaste, baking soda paste, a commercial kit, or sandpaper as outlined above. Apply the product or abrasive material with a soft cloth or pad, rubbing gently in the direction of the grain.
- Buff and Finish: Once the scratch is removed or significantly minimized, rinse the area thoroughly to remove any residue. Dry the bowl completely. For an enhanced shine, you can apply a small amount of stainless steel polish or olive oil to a clean microfiber cloth and buff the entire surface. This step helps to create a uniform finish and restore the bowl’s luster.
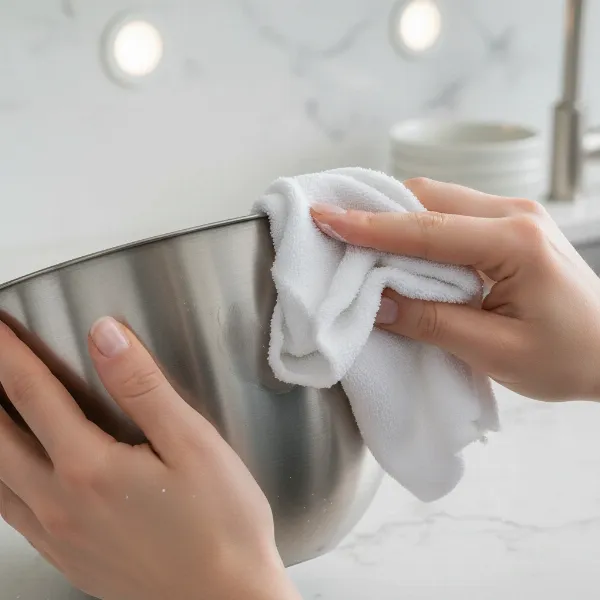 A person gently polishing a stainless steel bowl to remove scratches using a soft cloth and polishing compound, following the grain of the metal
Preventing Future Scratches
While knowing how to remove scratches is valuable, prevention is always the best strategy for maintaining your stainless steel bowls. Adopting a few simple habits can significantly prolong their pristine condition.
- Choose the Right Utensils: Avoid using metal spatulas, whisks, or other sharp metal tools directly against the surface of your stainless steel bowls. Opt for silicone, wood, or plastic utensils, which are much gentler and won’t leave abrasive marks.
- Proper Cleaning Techniques: Use soft sponges, microfiber cloths, or brushes with mild dish soap for cleaning. Steer clear of steel wool, harsh scouring pads, and abrasive cleaners, as these can easily scratch the protective surface of your bowls. For stubborn food residue, soak the bowl in warm water rather than aggressively scrubbing it.
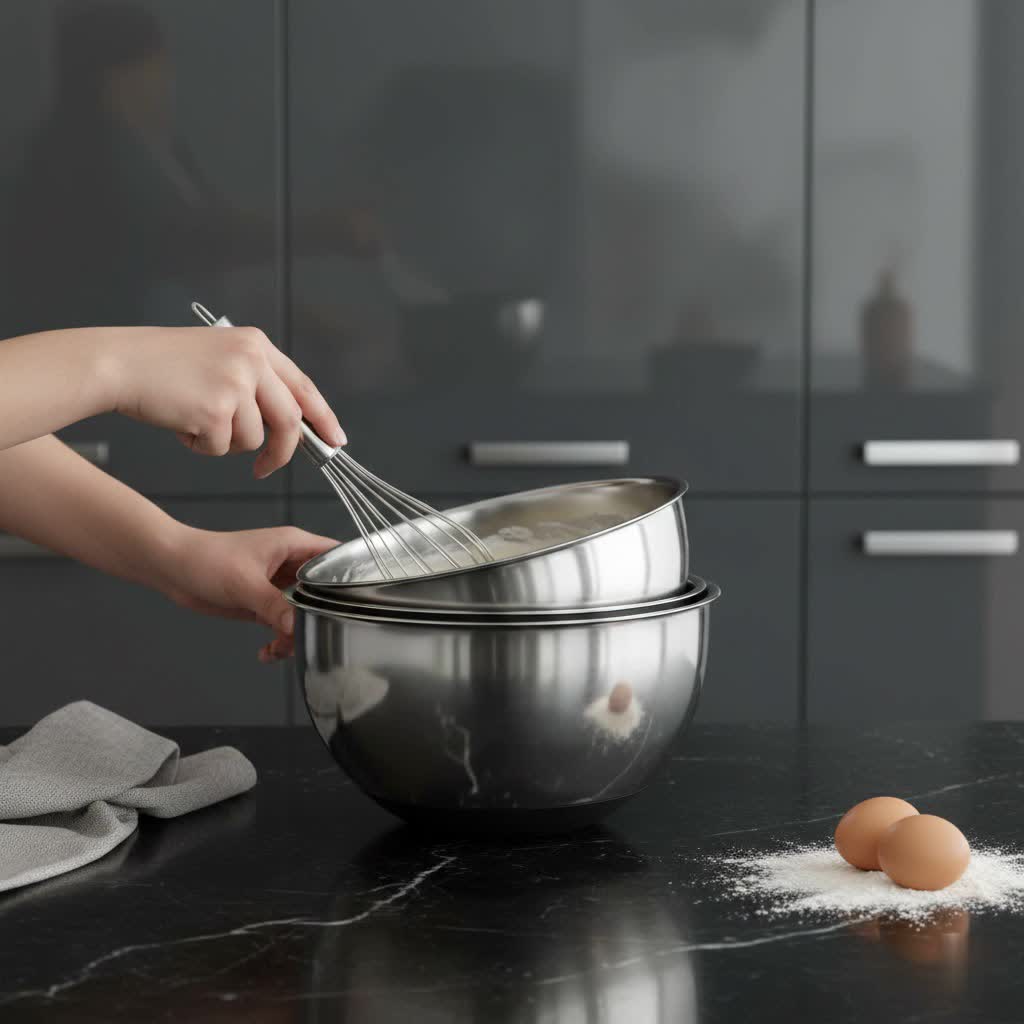
- Smart Storage Solutions: When nesting stainless steel bowls, place a protective barrier between them to prevent scratches from metal-on-metal contact. Paper towels, cloth napkins, or silicone mats are excellent choices to keep surfaces separated and safe. Avoid dropping heavy or sharp objects into your bowls, especially during washing or while handling them.
- Immediate Drying: After washing, dry your stainless steel bowls immediately with a soft cloth. This prevents hard water spots and film from forming, which can sometimes be mistaken for minor surface imperfections and require additional cleaning.
When to Seek Professional Help
While many scratches can be addressed at home, there are instances where professional help is the most advisable course of action. If a scratch is exceptionally deep, covers a large area, or if you’ve attempted DIY methods without success and fear causing further damage, it might be time to consult an expert. Metal refinishing companies or specialized appliance repair services can often restore severely damaged stainless steel, ensuring the job is done correctly and safely.
Conclusion
Scratches on your favorite stainless steel bowls don’t have to be a permanent blight. With a clear understanding of the material and the various effective methods available, you can confidently tackle most imperfections. From the gentle abrasive power of toothpaste and baking soda for minor scuffs to specialized commercial kits or careful sanding for deeper marks, there’s a solution for nearly every situation. Remember to always work with the grain, prioritize testing, and most importantly, practice preventative care to keep your bowls gleaming. By incorporating these tips into your kitchen routine, you’ll ensure your stainless steel companions remain functional and beautiful for countless culinary adventures.
What methods have you found most effective in maintaining the shine and longevity of your stainless steel kitchenware?
Frequently Asked Questions
Can all scratches be removed from stainless steel bowls?
While many minor and even some deeper scratches can be significantly reduced or completely removed, exceptionally deep gouges that alter the metal’s structure might not be fully restorable without professional intervention or specialized equipment. It’s often possible to improve their appearance greatly, but not all damage is entirely reversible.
Is it safe to use abrasive cleaners on stainless steel?
Generally, no. Harsh abrasive cleaners, steel wool, or abrasive scouring pads can damage the passive, protective layer of stainless steel, leading to new scratches and potentially making the surface more susceptible to corrosion or dullness. Stick to mild dish soap, baking soda paste, or cleaners specifically designed for stainless steel.
How often should I clean my stainless steel bowls?
It’s best to clean your stainless steel bowls after each use with mild soap and water. For deeper cleaning or to maintain their luster, an occasional polish with a dedicated stainless steel cleaner or a quick wipe with olive oil can be beneficial. Regular cleaning and immediate drying prevent buildup and water spots.
What’s the best way to maintain the shine of stainless steel?
To maintain the shine of stainless steel, consistently clean bowls with mild soap and a soft cloth, then dry them immediately to prevent water spots. Periodically, you can use a stainless steel polish or wipe the surface with a small amount of olive oil (applied with a microfiber cloth and buffed) to enhance its luster and create a protective barrier.
Can I use a regular car scratch remover on stainless steel?
No, it’s generally not recommended to use car scratch removers on stainless steel bowls. Products formulated for car paint might contain chemicals or abrasives that are too harsh or unsuitable for the specific composition and finish of stainless steel, potentially causing discoloration or further damage. Always use products specifically designed for stainless steel.